
The Cheesecake That Turns a Favorite Cookie Into a Full Dessert
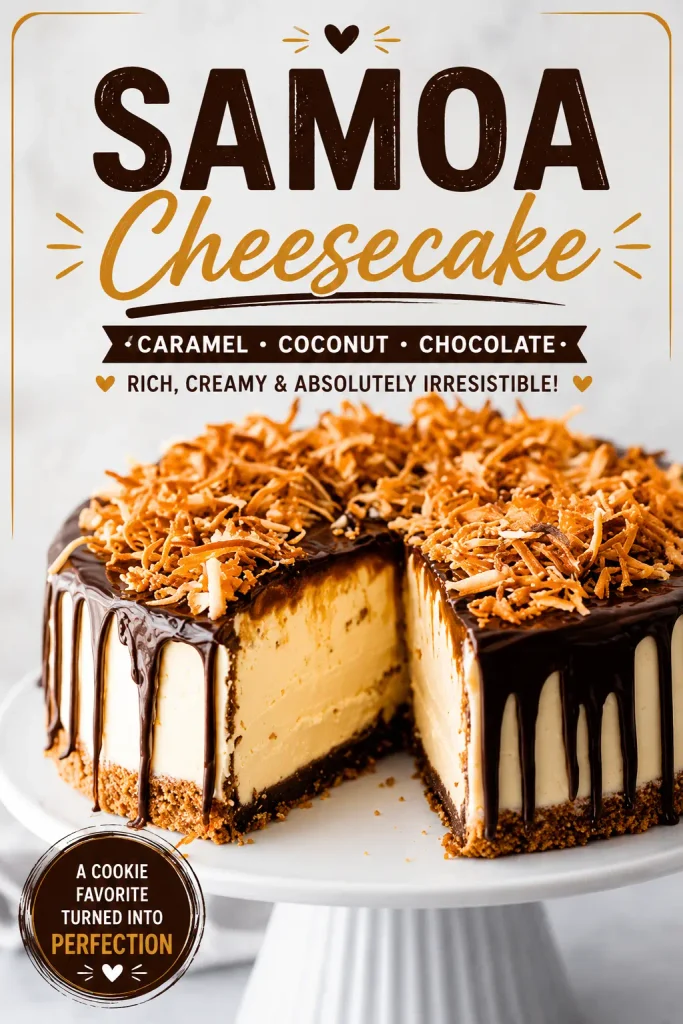
Some desserts start as an idea that just won’t let go — in this case, taking everything great about a classic caramel-coconut-chocolate cookie and turning it into a full cheesecake. An Oreo crust, a smooth cream cheese filling, and a topping of toasted coconut, caramel, and dark chocolate drizzle come together into something that looks like it came from a bakery case.
It’s more approachable to make than it looks, and the payoff is genuinely worth the wait. Here’s exactly how I make it.
What You’ll Need (serves 12–16)
For the crust:
- 24 Oreo cookies, finely crushed
- 4 tablespoons melted butter
- Pinch of salt
For the filling:
- 3 (8-ounce) bricks Neufchâtel (low-fat) cream cheese, softened
- 1 cup granulated sugar
- 1 cup plain or vanilla Greek yogurt
- 2 teaspoons vanilla extract
- 3 eggs
For the topping:
- 2 cups shredded sweetened coconut
- 1¾ cups caramel dip or sauce
- 4 ounces dark chocolate
How to Make It
1. Prepare the crust.
Preheat your oven to 325°F and grease a 9-inch springform pan. Wrap the outside with two layers of heavy-duty foil to prevent water from seeping in during baking. Combine the crushed Oreos with melted butter and a pinch of salt, then press the mixture evenly into the bottom of the pan.
2. Make the filling.
Beat the softened cream cheese with the sugar until completely smooth, then mix in the Greek yogurt and vanilla. Add the eggs one at a time, mixing gently after each addition — overbeating at this stage can introduce too much air, which sometimes leads to cracking. Pour the filling over the crust and smooth the top with a spatula.
3. Bake in a water bath.
Place the cheesecake in a water bath (a larger pan filled partway with hot water) to promote even baking and help prevent cracks. Bake for about 90 minutes, until the center is just set with a slight wobble remaining. Turn off the oven and let the cheesecake sit inside for a few minutes before removing it from the water bath — this gradual cooling helps it settle without cracking.
4. Make the Samoa topping.
Toast the shredded coconut until golden brown, watching closely since it can go from perfect to burnt quickly. Mix the toasted coconut with the caramel sauce, then spread it generously over the cooled cheesecake. Melt the dark chocolate and drizzle it over the top for that signature finish.
5. Chill.
Refrigerate for at least 4 hours, or overnight for the best texture. This chilling time is what lets the cheesecake fully set, making it much easier to slice cleanly.
Tips for the Best Results
Toast the coconut yourself rather than skipping this step — it brings out a much deeper, nuttier flavor than untoasted coconut. Room-temperature cream cheese prevents lumps and gives you a genuinely silky filling. Don’t rush the chilling process; it’s essential for the cheesecake to hold its structure when sliced. For the smoothest chocolate drizzle, melt it slowly over a double boiler rather than blasting it in the microwave.
Easy Variations
For a dairy-free version, use coconut cream cheese and a dairy-free yogurt alternative. Swap the granulated sugar for a natural sweetener like erythritol if you want something lower in sugar. Crushed pecans or almonds mixed into the crust add a nice crunch, and mini chocolate chips folded into the filling are an easy way to add even more chocolate throughout.
How to Serve It
Slice with a warm, clean knife for the neatest pieces, wiping the blade between cuts. Extra toasted coconut and a small drizzle of caramel on top make for a nice finishing touch, and a dollop of whipped cream or a scoop of vanilla ice cream alongside takes it even further.
Make Ahead and Storage
Keep the cheesecake covered in the fridge for up to 5 days. For longer storage, wrap individual slices tightly in plastic wrap and then foil, and freeze for up to 2 months, thawing overnight in the fridge before serving. It’s best served chilled straight from the fridge — no reheating needed — though letting it sit at room temperature for about 15 minutes before serving softens the texture slightly if you prefer that.
Why This One Is Worth the Effort
What makes this cheesecake so satisfying isn’t complicated technique — it’s the layering of familiar, well-loved flavors into a format that feels like a genuine occasion. Creamy, sweet, chocolatey, and toasty all at once, it’s the kind of dessert that looks like a bakery purchase but comes together with fairly straightforward steps once you understand the rhythm: crust, filling, bake, topping, chill.