
The Dessert That Settles the Apple Crumble vs. Cheesecake Debate
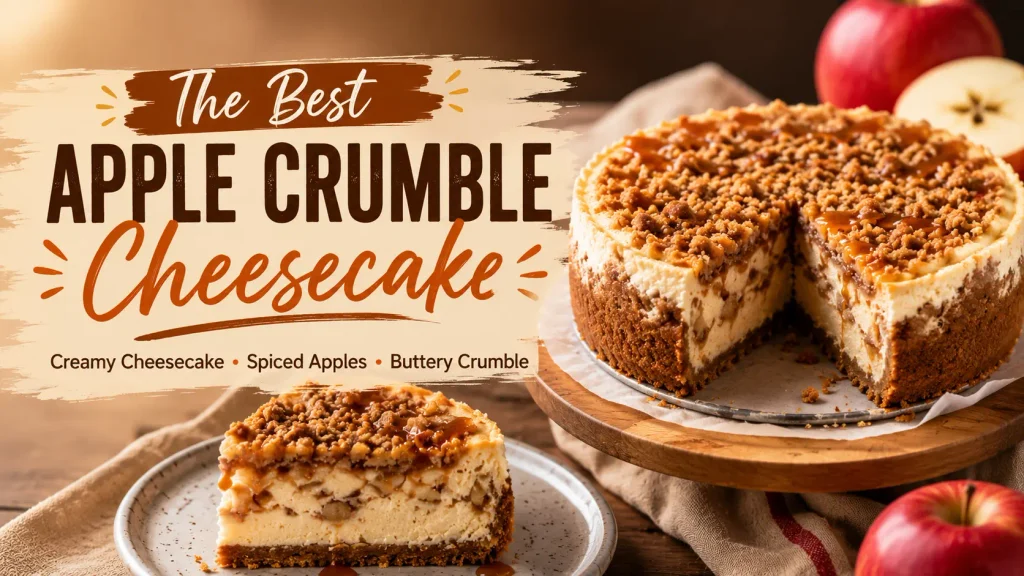
Some desserts feel like they’re forcing you to choose — warm, cozy apple crumble on one side, rich, creamy cheesecake on the other. This recipe refuses to pick, combining both into one dessert with a crisp graham cracker base, a smooth cheesecake layer, spiced apples in the middle, and a buttery crumble topping over everything.
It looks like a bakery showstopper, but each layer on its own is genuinely simple — the real work is just patience while it bakes and chills. Here’s exactly how I make it.
What You’ll Need (serves 10–12)
For the crust:
- 200g graham crackers, finely crushed
- 100g unsalted butter, melted
- 2 tablespoons granulated sugar
For the apple filling:
- 4 medium apples, peeled and diced
- ½ cup brown sugar
- 1 teaspoon ground cinnamon
- 1 tablespoon lemon juice
- 1 teaspoon cornstarch
For the cheesecake filling:
- 500g full-fat cream cheese, softened
- ¾ cup granulated sugar
- 2 large eggs, room temperature
- 1 teaspoon vanilla extract
- ½ cup sour cream
For the crumble topping:
- ¾ cup all-purpose flour
- ⅓ cup brown sugar
- 75g cold unsalted butter, cubed
- ½ teaspoon ground cinnamon
How to Make It
1. Build the crust.
Mix the crushed graham crackers with melted butter and sugar until the texture resembles wet sand. Press firmly into the bottom of a lined springform pan, making sure it’s even. A short pre-bake helps it stay crisp under the layers that follow.
2. Cook the apple filling.
Combine the diced apples with brown sugar, cinnamon, lemon juice, and cornstarch in a saucepan over medium heat. Cook for a few minutes until the apples soften and the mixture thickens slightly. Let it cool completely — adding it warm risks melting into the cheesecake layer below.
3. Make the cheesecake filling.
Beat the softened cream cheese with sugar until smooth and completely lump-free. Add the eggs one at a time, then mix in the vanilla and sour cream. Mix gently at this stage — overbeating introduces air that can cause cracks later.
4. Assemble the layers.
Pour the cheesecake filling over the cooled crust and smooth the top. Spoon the cooled apple mixture evenly over the cheesecake layer, creating a clear line between the two once baked.
5. Make the crumble topping.
Rub the cold butter into the flour, brown sugar, and cinnamon until crumbly and rustic-looking, not doughy. Sprinkle it generously over the apple layer.
6. Bake.
Bake until the center is just slightly wobbly — that’s exactly what you want, since it firms up further as it cools. Overbaking dries the cheesecake out, so watch closely toward the end. Once done, turn off the oven and let the cheesecake cool gradually inside with the door slightly ajar.
7. Chill and serve.
Once cooled to room temperature, refrigerate for several hours. This chilling time is what lets all three layers set properly and gives you clean, structured slices instead of a mess on the plate.
Tips for the Best Results
Always use room-temperature cream cheese — it blends far smoother and avoids the lumps cold cream cheese tends to leave behind. Let the apple mixture cool fully before layering it on, so it doesn’t sink into or melt the cheesecake underneath. Bake on the center rack for the most even heat, and if you have the patience, chill it overnight rather than just a few hours — the flavors genuinely deepen by the next day.
Easy Variations
For a dairy-free version, swap in dairy-free cream cheese, plant-based butter, and a coconut-based sour cream alternative. To reduce sugar, replace part of it with a baking-friendly sweetener and lean on naturally sweet apples. For a gluten-free version, swap the graham crackers and flour for certified gluten-free alternatives. Chopped walnuts or pecans in the crumble add extra crunch, a pinch of nutmeg or cardamom deepens the apple layer’s flavor, and a drizzle of caramel sauce over the apples before adding the crumble makes it even more indulgent.
How to Serve It
Serve slightly chilled, sliced with a clean, sharp knife for the neatest cuts. A light dusting of powdered sugar or a drizzle of caramel sauce on top adds a nice finishing touch, and a dollop of whipped cream or a scoop of vanilla ice cream alongside makes it feel like something from a restaurant menu.
Make Ahead and Storage
This cheesecake is genuinely well-suited to making ahead, since it needs chilling time regardless — prepare it a day in advance and keep it refrigerated until you’re ready to serve. Store leftovers covered in the fridge for up to 4 days. To freeze, wrap individual slices tightly in plastic wrap and then foil; they’ll keep for up to 2 months, thawed overnight in the fridge before serving.
Why This One Is Worth the Multi-Step Process
What makes this dessert worth the effort isn’t any single difficult technique — it’s that three familiar, simple components come together into something that tastes like considerably more work than it actually was. Creamy cheesecake, warm spiced apples, and a buttery crumble in every bite is a combination that’s hard to say no to, and once you’ve made it through the layering process once, it becomes a genuinely approachable dessert to repeat every fall and winter.
