
The No-Bake Dessert That Disappeared Before I Even Got a Photo
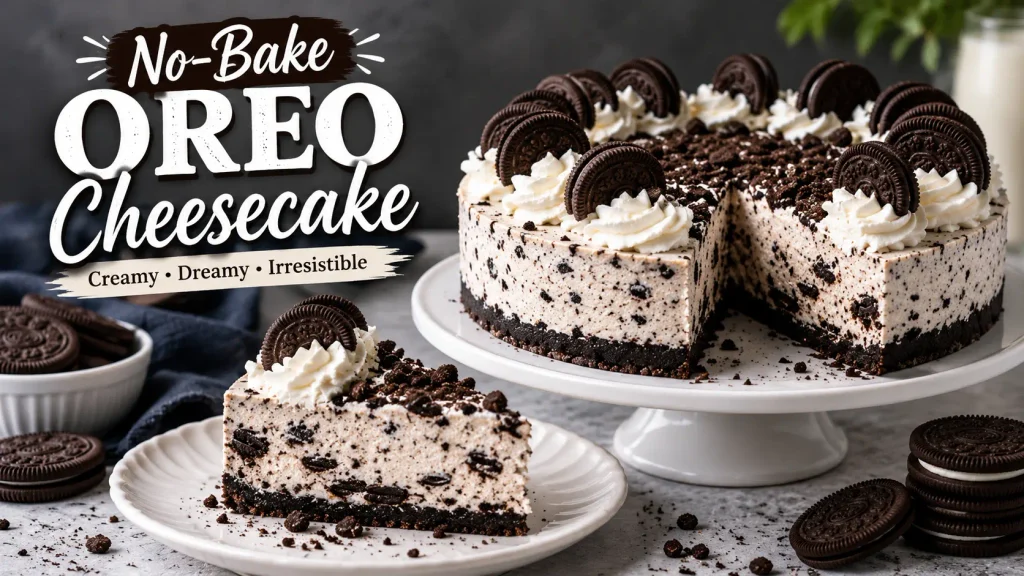
Some desserts earn their spot at the party before anyone’s even had a bite — you set them down, and within minutes half the plate is gone. This Oreo cheesecake is exactly that kind of dessert. No oven required, just a food processor, a mixer, and a few hours of patience while the fridge does the real work.
It’s built in layers that each pull their weight: a buttery, crunchy Oreo crust, a rich chocolate cheesecake filling loaded with actual cookie pieces, and a cloud of whipped cream on top. The first time I made it was for a friend’s birthday, and it turned out to be the thing everyone asked about. Here’s exactly how I make it.
What You’ll Need (serves 20)
For the crust:
- 1 (18-ounce) package Oreo cookies, divided
- ¼ cup unsalted butter, melted
For the filling:
- 4 (8-ounce) packages cream cheese, softened
- ¾ cup granulated sugar
- ¼ cup unsweetened cocoa powder
- 1 teaspoon vanilla extract
- 6 ounces semi-sweet chocolate, melted and slightly cooled
- 1¼ cups heavy cream
- 2 tablespoons powdered sugar
- Crushed Oreos (from the reserved cookies), for folding in
For the topping:
- 1 cup heavy cream
- 2 tablespoons powdered sugar
- Extra crushed Oreos, for garnish
- Hot fudge sauce, for drizzling (optional)
How to Make It
1. Build the crust.
Lightly grease a 9-inch springform pan and line the bottom with parchment paper. Crush most of the Oreos into fine crumbs in a food processor, reserving a handful of whole cookies to crush later for garnish and mixing into the filling. Combine the fine crumbs with the melted butter and press the mixture firmly into the bottom and up the sides of the pan — a flat-bottomed glass or measuring cup works well for packing it down evenly. Chill in the fridge while you make the filling.
2. Melt the chocolate.
Melt the semi-sweet chocolate in the microwave in short bursts, stirring between each round, until smooth and glossy. Set aside to cool slightly — adding it too hot to the cream cheese can cause the mixture to seize or curdle.
3. Whip the cream for the filling.
In a separate bowl, whip 1¼ cups of heavy cream with the powdered sugar until stiff peaks form. Set aside.
4. Make the cheesecake base.
Beat the softened cream cheese, granulated sugar, cocoa powder, and vanilla together until completely smooth. Mix in the melted chocolate until fully incorporated.
5. Fold in the whipped cream and Oreos.
Gently fold the whipped cream into the cream cheese mixture using a spatula — fold rather than stir, to keep the filling light and airy instead of dense. Once combined, fold in the reserved crushed Oreos.
6. Fill and chill.
Spread the filling evenly into the chilled crust, smoothing the top with a spatula. Refrigerate for at least 3–4 hours, until fully set — overnight is even better for the best texture.
7. Make the topping.
Whip the remaining cup of heavy cream with the powdered sugar until stiff peaks form. Transfer to a piping bag fitted with a round or star tip.
8. Decorate and serve.
Pipe the whipped cream decoratively over the top of the chilled cheesecake, then finish with a scattering of extra crushed Oreos and a drizzle of hot fudge sauce if you like. Slice and serve.
Tips for the Best Results
For a sturdy crust that won’t crumble when sliced, crush the Oreos as finely as possible and press the mixture firmly into the pan. Let the cream cheese come fully to room temperature before mixing — cold cream cheese leaves lumps that are hard to smooth out later. Chilling your mixing bowl and beaters before whipping cream helps it reach stiff peaks faster and more reliably; just be careful not to overwhip, which turns the texture grainy. When melting chocolate, work in 20–30 second microwave bursts rather than one long stretch, to avoid scorching it.
Fold the whipped cream in gently rather than stirring vigorously — this is what keeps the filling light instead of dense. Lining the pan with parchment makes transferring the finished cheesecake to a serving plate much easier. And for clean slices, run your knife under hot water and wipe it dry between each cut.
Storage
Store the cheesecake covered in the fridge for up to 5 days. For longer storage, slice it first, wrap individual pieces in plastic wrap and then foil, and freeze.
Why This One Earns Its Spot at Every Party
What makes this cheesecake so reliably popular isn’t complicated technique — it’s that every layer delivers real Oreo flavor, and the no-bake method means there’s no risk of a cracked top or an over-baked center to worry about. Rich, creamy, packed with cookie crunch throughout, and finished with a swirl of whipped cream, it’s the kind of dessert that looks like it took far more effort than it actually did. If you’re looking for another impressive cheesecake dessert for a special occasion, check out my Red Velvet Cheesecake Cake, featuring classic red velvet cake, a creamy cheesecake center, and cream cheese frosting.
For another classic chocolate dessert with a beautiful presentation, try my Black Forest Cake Recipe, made with rich chocolate cake, cherries, and fluffy whipped cream.