
The Cake That Made Everyone Ask “Wait, You Made This?”
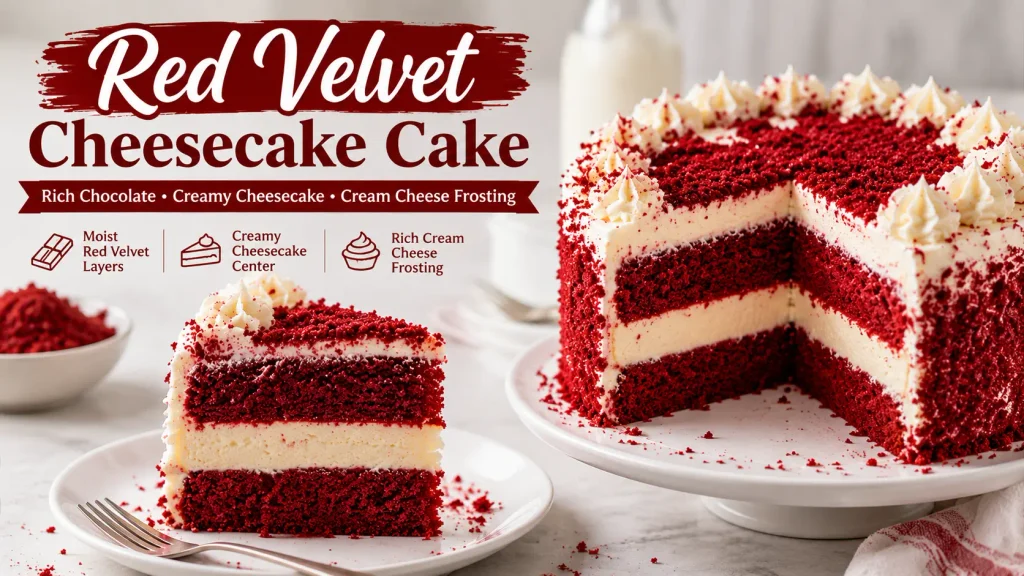
There’s a specific kind of cake that shows up at restaurants and makes you wonder how it’s assembled — red velvet on the outside, a full layer of cheesecake hidden inside, cream cheese frosting over everything. This is that cake, built at home, and it turns out to be far more approachable than it looks once you break it into its three separate components.
Each part on its own is fairly simple — a baked cheesecake, a red velvet cake, and a cream cheese frosting. The magic is really just in how they’re layered together, and once you understand the order, the whole thing stops feeling intimidating and starts feeling like a genuinely doable weekend project. Here’s exactly how I make it.
What You’ll Need (serves 16)
For the cheesecake layer:
- Two 8-ounce packages cream cheese, room temperature
- ⅔ cup granulated sugar
- Pinch of salt
- 2 large eggs
- ⅓ cup sour cream
- ⅓ cup heavy whipping cream
- 1 teaspoon vanilla extract
For the red velvet cake:
- 2½ cups all-purpose flour
- 1½ cups granulated sugar
- 2 tablespoons unsweetened cocoa powder
- 1½ teaspoons baking soda
- 1 teaspoon salt
- 2 large eggs, room temperature
- 1½ cups vegetable or canola oil
- 1 cup buttermilk
- ¼ cup (two 1-ounce bottles) red food coloring
- 2 teaspoons vanilla extract
- 2 teaspoons white vinegar
For the cream cheese frosting:
- 2½ cups powdered sugar, sifted
- Two 8-ounce packages cream cheese, room temperature
- ½ cup (1 stick) unsalted butter, room temperature
- 1 tablespoon vanilla extract
How to Make It
1. Bake the cheesecake layer first.
Preheat your oven to 325°F and set a large roasting pan on the lower rack. Bring a kettle of water to a boil. Spray a 9-inch springform pan with nonstick spray, line the bottom with parchment, and wrap the outside tightly in a double layer of foil to keep water from seeping in during baking. Beat the cream cheese until smooth, mix in the sugar and salt for about 2 minutes, then add the eggs one at a time, blending after each. Finish by mixing in the sour cream, heavy cream, and vanilla until smooth. Pour the batter into the prepared pan, set it in the roasting pan, and carefully pour boiling water around it until it reaches about an inch up the sides. Bake for 45 minutes, until set but not jiggly.
2. Cool and freeze the cheesecake.
Let the cheesecake cool on a wire rack for at least an hour, then transfer it to the freezer until completely frozen — several hours, or overnight. Freezing it makes the layer far easier to handle when it’s time to assemble the cake.
3. Bake the red velvet layers.
Preheat your oven to 350°F and grease and flour two 9-inch round pans. Whisk together the flour, sugar, cocoa powder, baking soda, and salt in a large bowl. Add the eggs, oil, buttermilk, food coloring, vanilla, and vinegar, then beat on medium-low for a minute until blended, scraping the bowl as needed. Increase to high speed and beat for another 2 minutes. Divide the batter evenly between your pans and bake for 30–35 minutes, until a toothpick comes out with just a few moist crumbs. Cool in the pans for 10 minutes, then run a knife around the edges and invert onto a rack to cool completely.
4. Make the frosting.
Beat the powdered sugar, cream cheese, butter, and vanilla together on medium-high speed until smooth and creamy — be careful not to overbeat, which can make the frosting too soft to work with.
5. Assemble the layers.
Place one cake layer on your serving plate. Remove the frozen cheesecake from its pan, peel off the parchment, and compare its size to the cake layers — if it’s slightly larger, gently shave the edges down to match. Set the cheesecake layer on top of the cake, then place the second cake layer on top of that.
6. Crumb coat first.
Using a long, thin spatula, spread a thin, even layer of frosting over the entire cake, wiping your spatula clean between dips so you’re not transferring red crumbs back into your frosting bowl. Don’t worry if crumbs are still visible at this stage — that’s what the crumb coat is for. Refrigerate for 30 minutes to let it set.
7. Finish frosting and decorate.
Add a generous scoop of frosting to the top and spread it evenly across the top and down the sides. Because the crumb coat trapped the crumbs underneath, this final layer should come out clean and smooth. Decorate as you like — piped frosting, or shaved white chocolate curls for a bakery-style finish. Keep the cake refrigerated until serving.
Tips for the Best Results
To make white chocolate shavings, soften a chunk of white chocolate in the microwave for 15–30 seconds, then run a vegetable peeler down the side to create curls — shaving directly onto a plate makes it easy to slide them onto the cake. This cake can sit out at room temperature for an hour or so while serving at a party, but otherwise keep it refrigerated. It also freezes beautifully whole — bake it one day, freeze it, and pull it out the next.
If you’d prefer a simpler cheesecake dessert without the baking and layering, try my No Bake Oreo Cheesecake, packed with creamy chocolate flavor and crunchy Oreo cookies.
Why This One Is Worth the Multi-Step Process
What makes this cake special isn’t any single difficult technique — it’s that three genuinely simple components (a baked cheesecake, a classic cake, a basic frosting) come together into something that looks and tastes like it took far more effort than it did. Freezing the cheesecake before assembly is really the trick that makes everything manageable, turning what looks like a bakery-only project into something you can genuinely pull off at home. If you love rich chocolate-and-cherry desserts, my Black Forest Cake Recipe is another beautiful homemade cake worth trying.

