
The One-Skillet Chicken Thighs Recipe That Actually Delivers on Flavor

There’s a specific kind of weeknight dinner failure that happens when you’re trying to do “healthy” and “fast” at the same time: the chicken turns out fine, technically cooked, but forgettable. No crust, no real sauce, nothing that makes you want to go back for seconds. This lemon garlic butter chicken thighs skillet solves that problem in one pan and about half an hour, and it does it with a handful of pantry staples rather than anything exotic.
The trick isn’t a complicated technique — it’s building flavor in layers, right in the same skillet, so nothing gets wasted and everything ends up tasting like it belongs together. Here’s exactly how I make it.
What You’ll Need
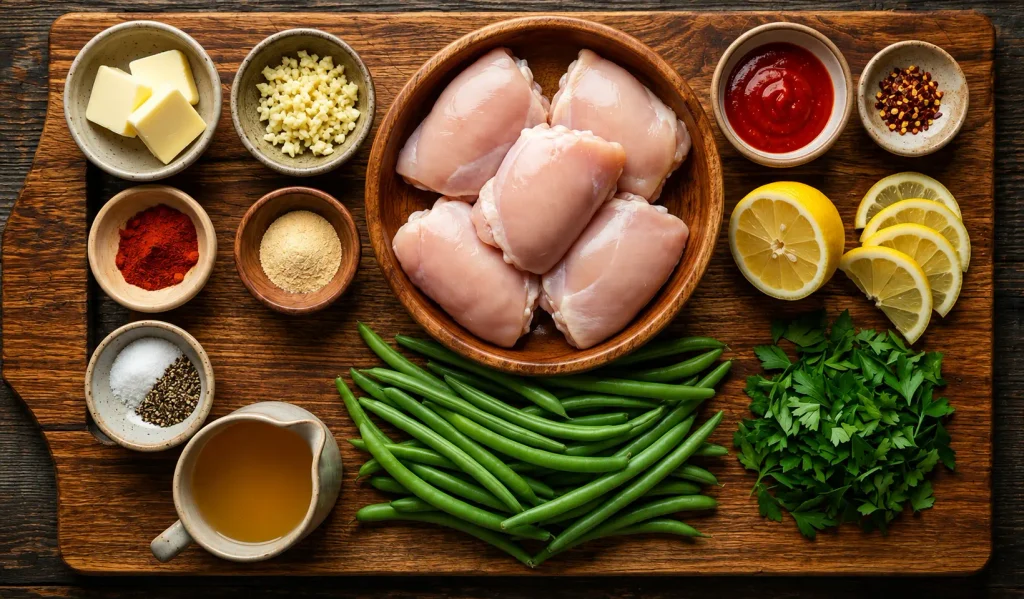
- 3–6 boneless, skinless chicken thighs
- 1 lb (450g) green beans, trimmed
- 3 tablespoons butter, divided (or ghee if you’re keeping it paleo)
- 4 garlic cloves, minced
- 1 teaspoon paprika
- 1 teaspoon onion powder
- 1/4 teaspoon salt, plus fresh cracked black pepper
- Juice of 1/2 a lemon, plus extra slices for garnish
- 1/2 cup (125ml) chicken stock
- 1 tablespoon hot sauce (Sriracha works well here)
- 1/4 teaspoon crushed red chili flakes, optional
- 1/2 cup fresh parsley, chopped
How to Make It
1. Dry the chicken first.
Pat the thighs completely dry with paper towel. Skipping this step is the most common reason chicken doesn’t brown properly — any surface moisture just steams instead of searing, so getting the thighs bone-dry matters more than people expect.
2. Build the spice rub.
In a small bowl, mix the paprika, onion powder, salt, and pepper. Rub it generously into both sides of the chicken and set the thighs aside while you get the green beans going.
3. Par-cook the green beans.
Place the trimmed green beans in a microwave-safe dish with about 1/2 cup of water and microwave for 8–10 minutes, until they’re just short of done but still have some bite. Getting them most of the way cooked now means they’ll finish perfectly in the sauce later without turning mushy.
4. Sear the chicken.
Heat a large cast iron skillet over medium-low and melt 2 tablespoons of butter. Lay the chicken thighs in top-side down and let them cook undisturbed for 5–6 minutes until golden, then flip and cook another 5–6 minutes until the internal temperature hits 165°F (75°C). If they’re browning too fast, drop the heat — thickness varies, so use the thermometer rather than the clock. Move the chicken to a plate once it’s done.
5. Build the sauce in the same pan.
Lower the heat and melt the last tablespoon of butter in the same skillet — all that browned chicken flavor stuck to the bottom is exactly what makes this sauce work. Add the parsley, garlic, hot sauce, chili flakes, and the pre-cooked green beans, and cook for 4–5 minutes, stirring often. Pour in the lemon juice and chicken stock and let it reduce for a couple of minutes until it thickens slightly.
6. Bring it back together.
Push the green beans to one side of the pan, nestle the chicken back in with the sauce, and let everything reheat together for a minute or two. Taste and adjust the pepper if needed.
7. Serve.
Plate it warm, finished with a little extra chili flake, fresh parsley, and a lemon slice if you want the citrus note up front.
Why the One-Pan Method Matters More Than Any Single Ingredient
Nothing here is fancy, but the order of operations is doing real work. Searing the chicken first and building the sauce in the same unwashed skillet means the fond — those browned bits left behind — becomes the base of the sauce instead of getting scrubbed down the drain. Par-cooking the green beans separately, rather than throwing them in raw, keeps them from turning either undercooked or waterlogged by the time the dish comes together. And finishing the chicken back in the sauce for just a minute, rather than serving it straight off the pan, is what actually marries the two components instead of leaving you with chicken next to beans.
Serving Suggestions
This pairs naturally with cauliflower rice or steamed white rice, a simple green salad, or crusty bread if you’re not worried about keeping things low-carb. It also holds its own as a standalone bowl — the sauce is rich enough that you won’t feel like you’re missing a starch.
Storage and Reheating
Keep leftovers in an airtight container in the fridge for up to three days. Reheat gently on the stove or in the microwave with a few drops of water to loosen the sauce back up. This one also works well portioned out ahead of time for lunches during the week.
Key Takeaways
Dry chicken browns better than wet chicken — always start there. Cooking everything in one skillet isn’t just about fewer dishes; it’s how the sauce picks up flavor the pan already built. Par-cooking the green beans separately protects their texture. And don’t skip returning the chicken to the pan at the end — that last minute in the sauce is what pulls the whole dish together instead of leaving it as two separate components on a plate.
Why This One Actually Works Every Time
This recipe doesn’t rely on a long ingredient list or unusual technique — it relies on sequencing. Dry the chicken, season it properly, sear it for real color, then use that same pan to build a sauce instead of starting fresh. Once you see why each step earns its place, this stops being “a recipe you followed” and becomes one you actually understand — which is what makes it repeatable on a random Tuesday, not just the one time you had the instructions in front of you.